Hey girl, remember those endless summer afternoons as kids when we’d raid the freezer for ice cream sticks and turn them into total masterpieces? Ice cream stick craft wall hangings on a budget are having a major moment right now, and I am here for it. They’re the perfect way to add that whimsical, handmade vibe to your space without breaking the bank.
I started messing around with these because my apartment walls were screaming for personality – like, blank canvas boring. Grabbed a pack of popsicle sticks from the dollar store, and boom, instant decor that looks way more expensive than it is. It’s that easy DIY magic we all crave when rent’s due.
Stick around because I’m sharing 15 quick ice cream stick craft wall hangings on a budget that’ll spark your creativity. You’ll get simple ideas, embeds to drool over, and tips to make them your own – no fancy tools needed.
15 Ice Cream Stick Crafts You’ll Wish You Made Sooner
Paper Cutout Prep Station
This setup shows you exactly how to start – scissors snipping paper shapes next to popsicle sticks and glue. I love how basic it looks, but girl, it leads to the cutest layered wall art. Last weekend, I recreated this on my kitchen table and ended up with confetti everywhere – total mess, but worth it for that pop of color.
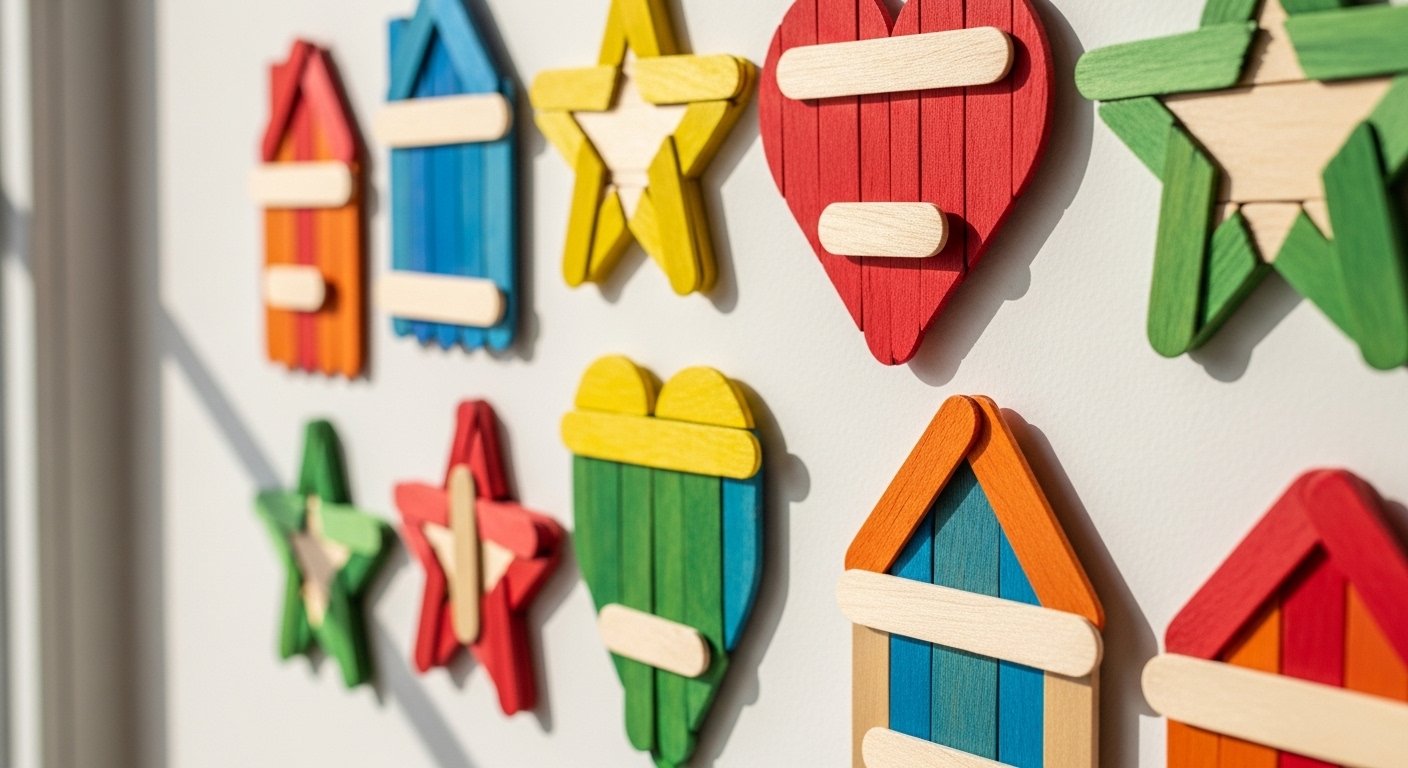
Cute Butterfly Birdhouse
Imagine a tiny blue birdhouse made from ice cream sticks, topped with a butterfly and dangling flowers – hangs perfectly as a whimsical wall accent. The textures mix so well, right? You could whip this up in an hour; I did one for my entryway and now every guest asks where I bought it.
Colorful Wooden Art Scatter
A table bursting with vibrant popsicle stick pieces ready to assemble into wall magic. It’s all about that rainbow chaos turning into organized beauty on your wall. Pro tip: paint ’em first for extra pop – my first try was uneven, but imperfections make it feel real.
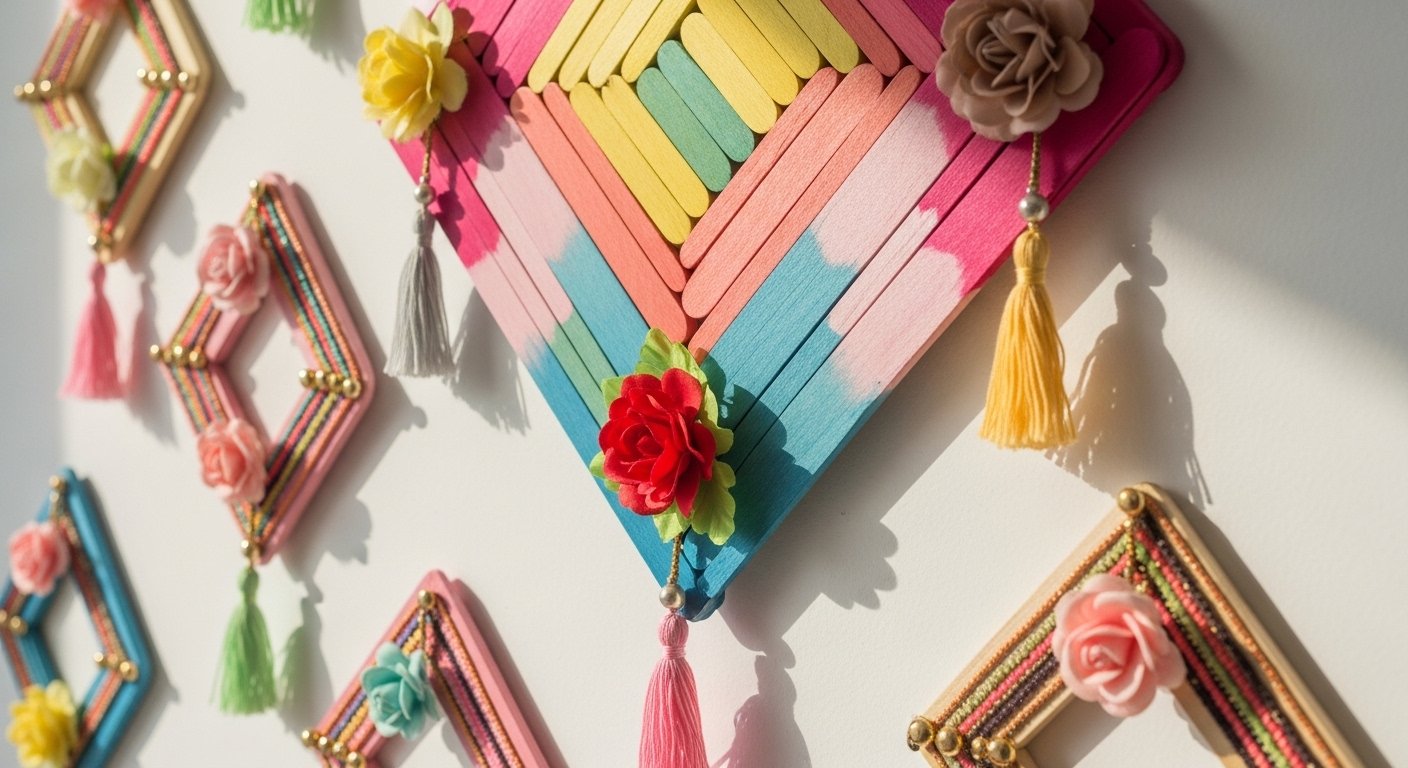
Geometric Diamond Centerpiece
Squares, circles, and a bold diamond in the middle – pure geometry goals from simple sticks. Hang it solo or cluster a few for impact. I made a bigger version for my bedroom wall; took two glue sticks but now it’s my fave focal point.
Interlocked Flower Squares
Three flowers woven into a square frame – so clever and springy. Popsicle sticks painted petal-style make it pop against any wall. You gotta try this; I gifted one to my sister, and she’s hooked on crafting now.
Rainbow Wind Chime Glow
This colorful chime dangles from a beam, but flip it vertical for wall hanging vibes with pencils nearby for that crafty inspo. The movement adds life – imagine it catching light in your living room. Side note: mine tangled once, but hot glue fixed it quick.
Framed Stick Portrait
A chic art piece on the wall screams custom without the price tag. Ice cream sticks form the frame around whatever pic you love. I swapped in a family photo; feels so personal, like hugging memories every day.
Wooden Block Planter Display
Hold up your own stacked popsicle block planter – succulents included for that green thumb flex. It’s functional art on a budget. My plant died twice before this (oops), but now it’s thriving and wall-ready.
Plant-Paired Wall Clock
A popsicle stick clock chilling next to a plant – timepiece with personality. Glue hands and numbers for easy assembly. I hung mine in the hallway; tells time and sparks convos every time.
Shelved Plant Trio
Three stick shelves cradling plants against a plain wall – storage meets decor. Perfect for trailing ivy or herbs. You can build these in 30 minutes; I did, and my air plants finally have a home.
Double Plant Shelves
Two wooden shelves loaded with greenery – ice cream stick simplicity at its best. Layer pots for depth. This one’s my go-to for small spaces; transformed my boring rental wall overnight.
Star Mobile Bedroom Magic
Stars dangling over a bed, Christmas tree bonus – adapt for year-round wall sparkle. Thin sticks twine into mobiles easily. I made a mini version for my niece’s room; she squeals every morning.
Rustic Metal Arrow Accents
Three arrows pointing whimsy – mix with popsicle sticks for hybrid wall art. Direction vibes without the commitment. Hung these above my desk; keeps me motivated during work-from-home slumps.
Abstract Wooden Wall Puzzle
Various stick shapes arranged like modern art – puzzle your way to perfection. No rules, just fun. I experimented one rainy day; ended up with my most complimented piece yet.
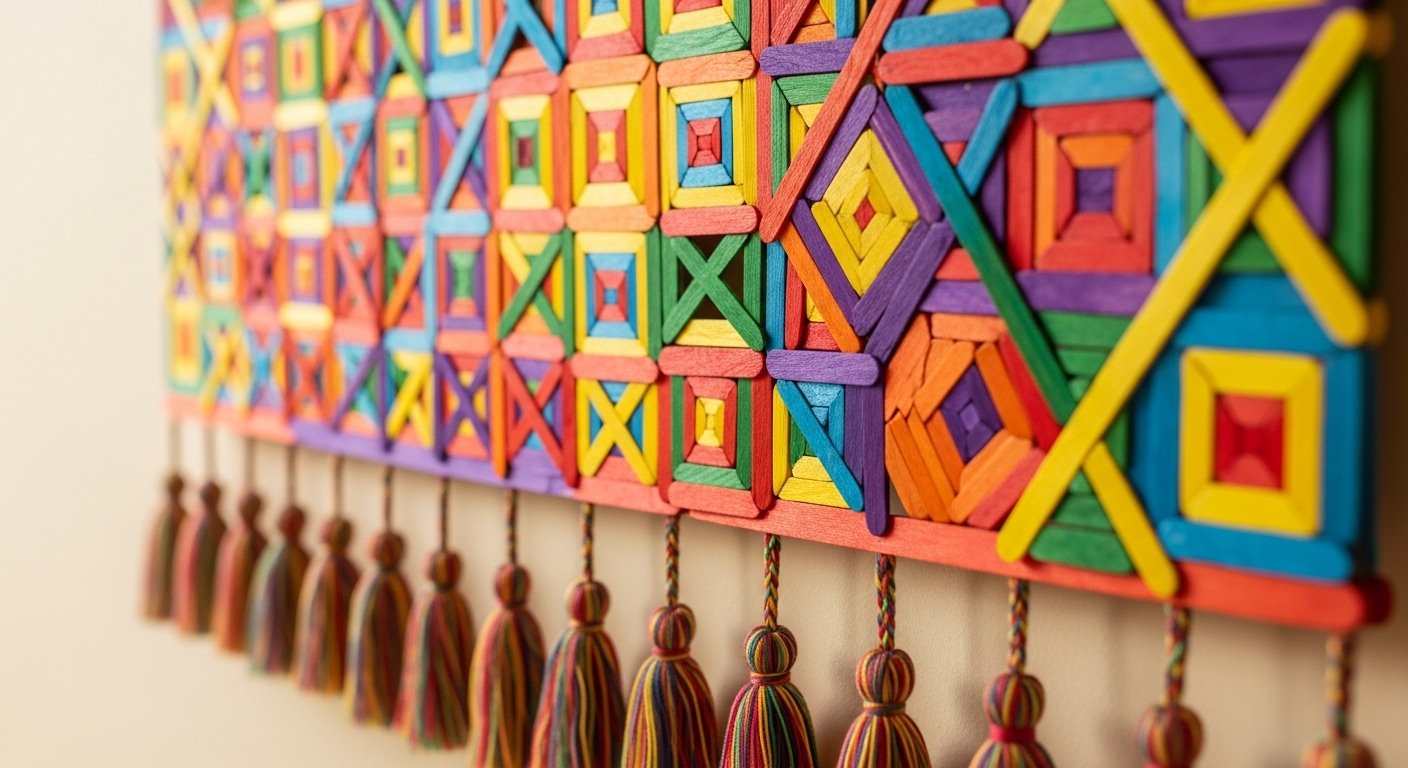
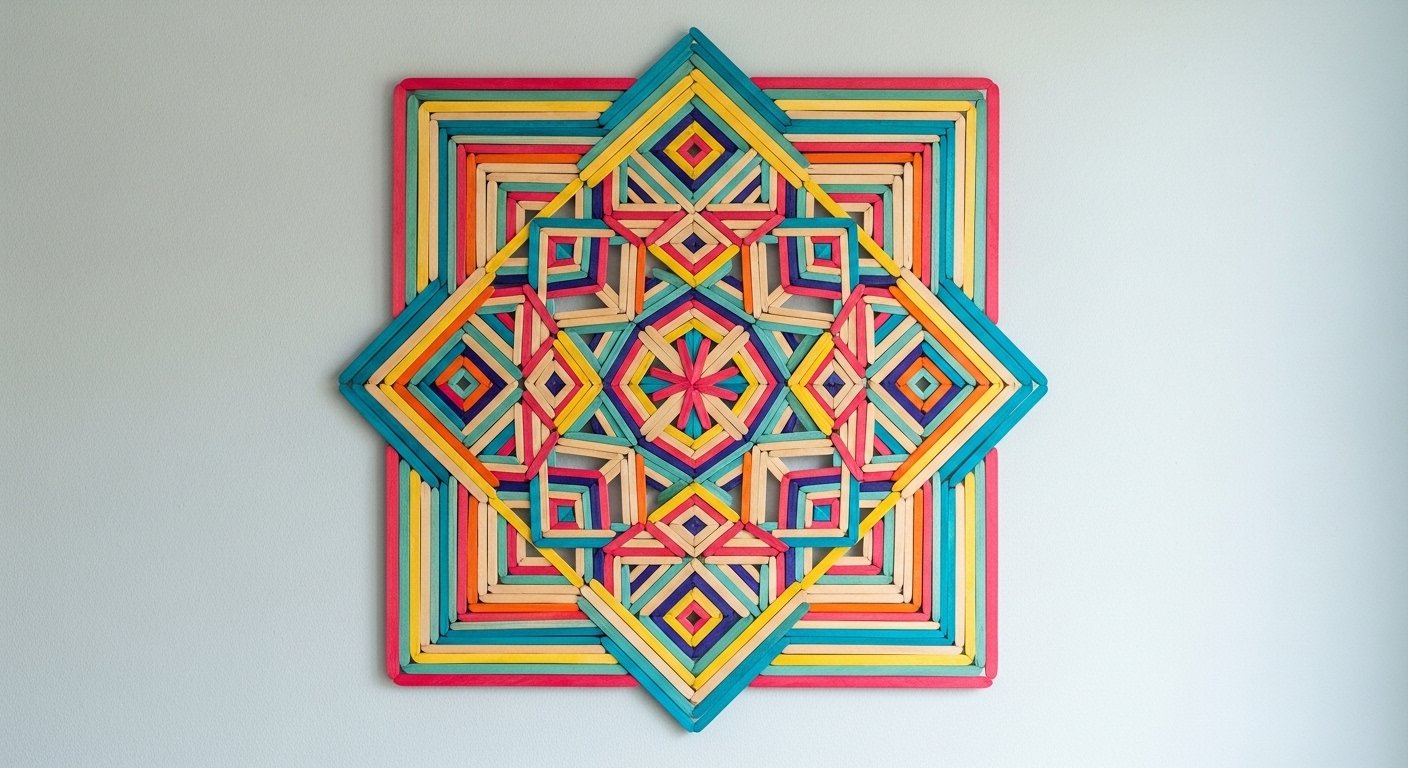
Circular Stick Mandala Frame
A wooden circle bursting with colored sticks – mandala heaven on popsicles. Frame it or hang freeform. This took me three tries to balance (glue guns are tricky), but now it’s gallery-worthy.
How to Actually Make This Work For You
Okay, real talk – start by raiding dollar stores for bulk ice cream sticks and non-toxic paints; they’re like $2 a pack and last forever. Grab hot glue and twine too, since they hold everything without fuss – I learned that after my first flop with regular glue that wouldn’t dry. Layer your designs on cardboard first to test the layout, then mount with command strips so renters like us don’t damage walls. Paint in batches while bingeing Netflix to keep it fun, and mix shapes for that boho imperfect charm we love. Scale up for big walls or down for galleries – versatility is key here, trust me.
What supplies do I need for ice cream stick crafts?
Popsicle sticks, hot glue gun, acrylic paints, scissors, and twine – all under $10 total. I grab mine at dollar stores or online packs. Keeps it stupid cheap and accessible.
How long do these wall hangings take?
Most are 30-60 minutes, drying time included. Paint ahead to speed it up. I multitask with podcasts – flies by.
Can I customize colors to match my room?
Absolutely, paint them any shade. Sample on scrap wood first. My teal ones match my couch perfectly now.
Are they sturdy enough for walls?
Yes, with good glue and brackets for heavier ones. Command strips work for light pieces. Mine’ve hung a year no issues.