Author: sh.azharrahim@gmail.com

  • 15 Quick Wall Hanging Diy On A Budget to Try

    15 Quick Wall Hanging Diy On A Budget to Try

    Hey girl, remember that blank wall in my apartment staring back at me every morning? I finally tackled it with some wall hanging DIY on a budget, and oh my gosh, it transformed the whole vibe. It’s like giving your space a hug without spending a fortune – I’m obsessed.

    This post is my little love letter to anyone feeling the renter blues or just pinching pennies like I was last month. I scoured my craft bin and thrift finds, messing around until these ideas clicked. One night, fueled by cheap wine and YouTube tutorials, I made my first one – total game-changer.

    You’re about to get 15 quick wall hanging DIY on a budget that’ll have your walls looking custom in under an hour. Easy steps, zero fancy tools, and all the inspo right here. Let’s make your space feel like home, yeah?

    15 Quick Wall Hanging DIYs on a Budget You’ll Wish You Tried Sooner

    Fabric Stick Flower Hanging

    This beauty uses scrap fabric, twigs from the yard, and fake flowers – I snagged the sticks on my last hike. Hung it above my couch, and it adds such a boho whisper without trying too hard. Total cost? Under $5 if you dig through your stash.

    Pink Jar Flower Display

    Grab mini jars from the dollar store, fill ’em with wildflowers or even candy hearts for fun. I hot-glued mine to a thrifted plate and voila – instant charm. You could swap the pink for whatever matches your room; mine’s in the kitchen now, making coffee breaks cuter.

    Colorful Chair Back Blooms

    Okay, not a traditional hanging, but drape fabric flowers over any chair against a wall – budget magic. I used tissue paper ones from last year’s party supplies. It screams playful art gallery without the price tag; my entryway needed this pop.

    Layered Living Room Drapes

    Layers of cheap scarves and ribbon tied to a dowel – that’s the secret here. I layered mine with stuff from my closet, hung by the door. Fills empty space perfectly; guests always ask where I bought it. Ha, thrift store secrets.

    Simple White Frame Art

    A plain white frame with whatever print you print at home – zero cost if you’re crafty. I drew a quick abstract inside mine with markers. Clean, modern, and swaps out easy when you’re over it.

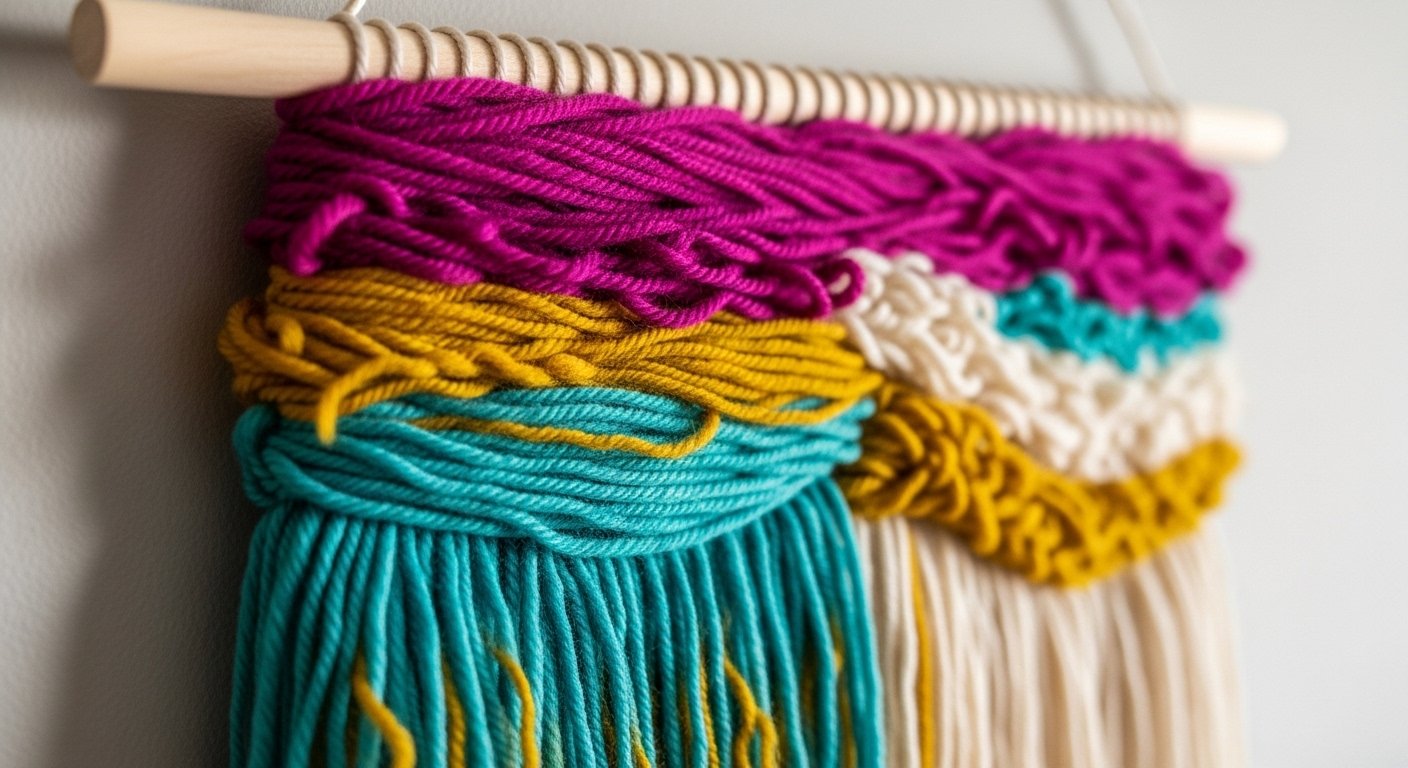
    Crochet Yarn Flower Wall

    Yarn scraps crocheted into a dreamy piece with fabric flowers pinned on. My grandma taught me the basics years ago, so this was nostalgic AF. Hang it solo or cluster ’em – your bedroom wall will thank you. Costs pennies if yarn’s leftover from scarves.

    Framed Picture Cluster

    Print phone pics in cheap frames from the dollar spot, arrange in a grid. I did family candids mixed with quotes – feels so personal. Pro tip: uneven spacing looks intentional, not sloppy.

    Tasseled Doily Dream

    Thread tassels through an old doily, hang from twine. I found the doily at a garage sale for a quarter – score! Adds texture without overwhelming; perfect for that awkward hallway spot you ignore.

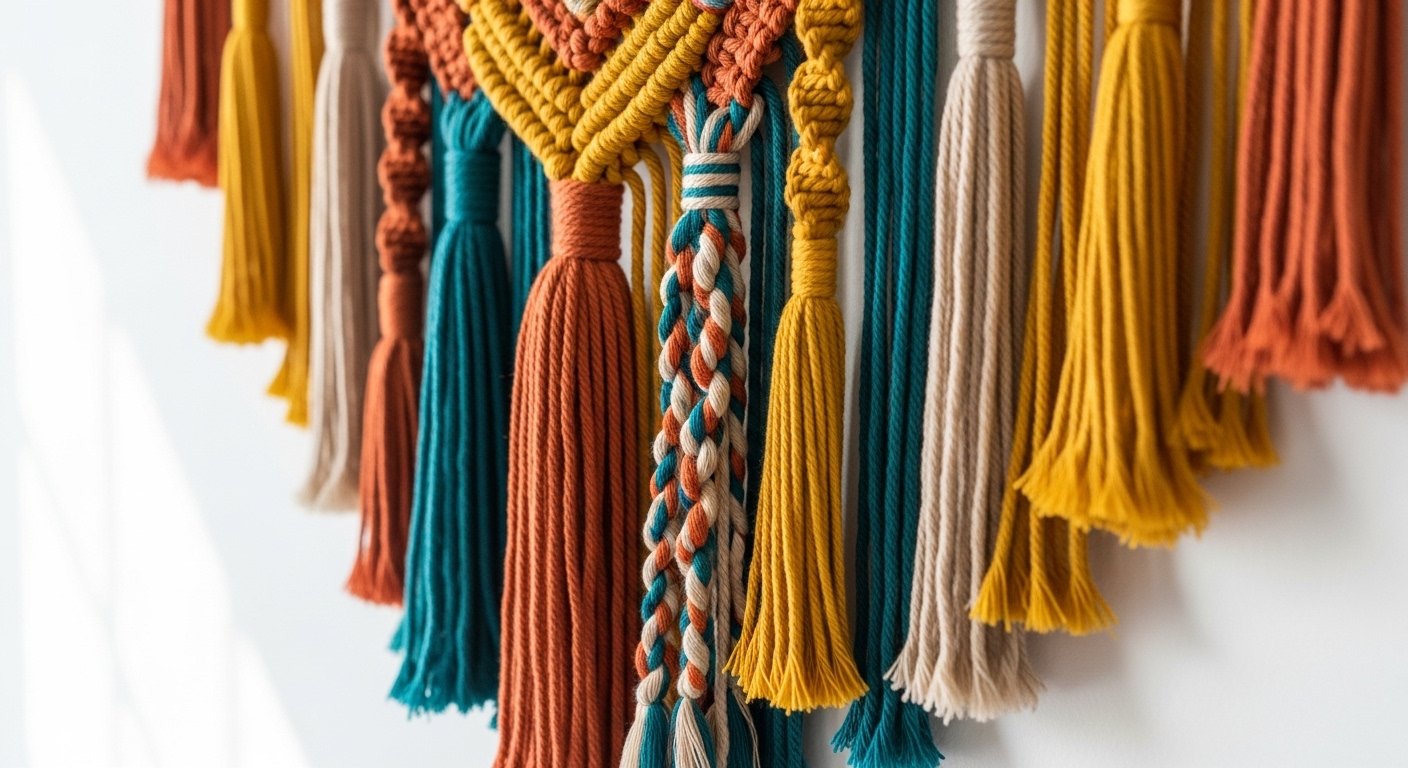
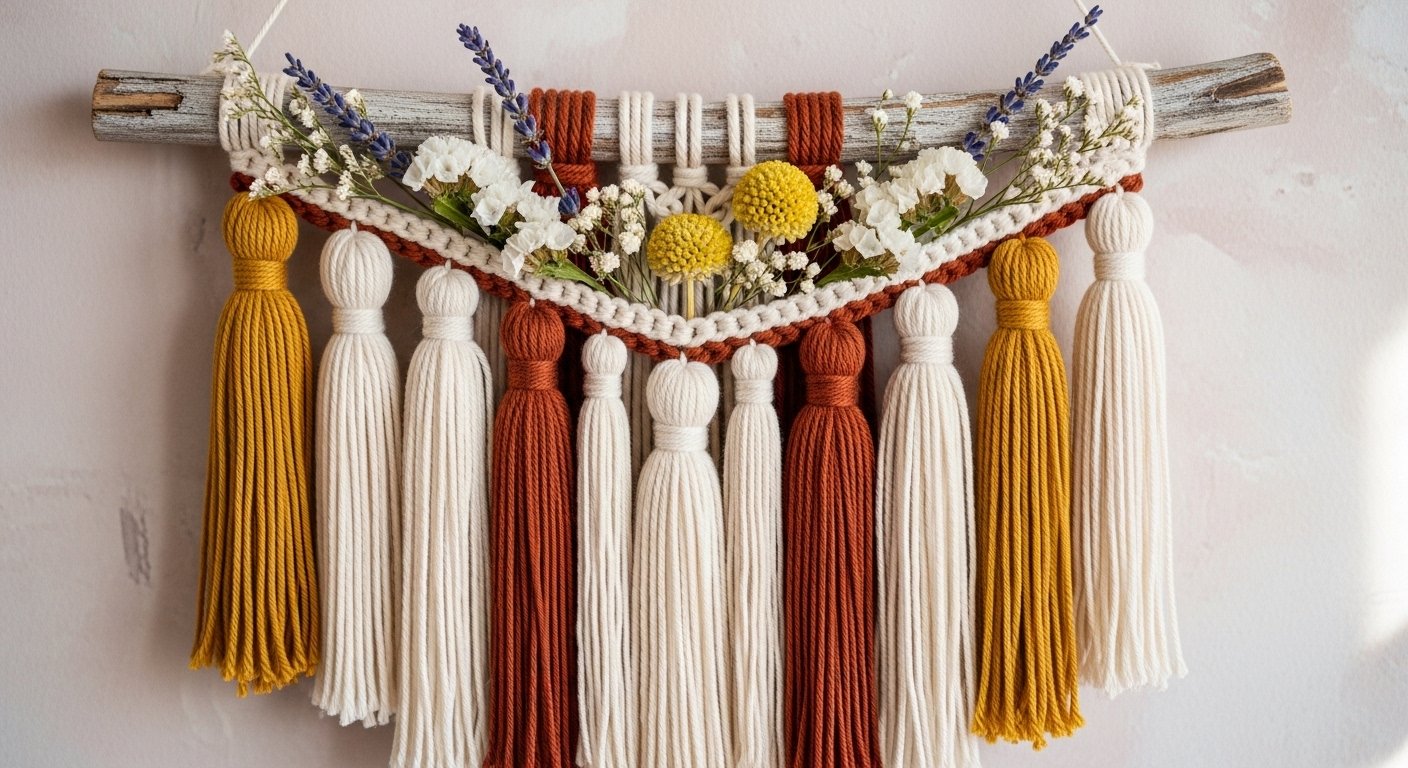
    Crocheted Flower Tassel Duo

    Crochet flowers with embroidery floss (super cheap), add side tassels next to a plant. Mine lives by my bed now, cozy vibes only. I messed up a few petals first try, but imperfections make it real – you?

    Wall Planter Flower Burst

    Macrame a quick hanger for a thrift mug, stuff with faux blooms. Hung by the window for light play. Fills vertical space on a dime; my succulents are jealous.

    White Flower Leaf Stick

    Paper leaves and flowers glued to a branch – kid-simple. I added mine to the bathroom mirror area. Fresh, airy, and gone in 10 minutes flat.

    Hanging Chair Flower Cascade

    Chain fabric flowers down from a hook behind a chair. Used old t-shirts cut into strips – eco win. Dining nook got this glow-up; eat your heart out, Pinterest pros.

    Leafy Sideboard Greenery

    Fake leaves draped over a sideboard edge against the wall. I twisted mine with dollar store vines. Living room feels lush now – total budget stretch.

    Succulent Wall Cascade

    Hang faux succulents from fishing line on a rod. Outdoor inspo for indoors – I tried real ones first, but fakes last longer. Balcony wall envy solved cheaply.

    Playful Bug Wall Cluster

    Colorful bug cutouts from cardstock pinned up whimsically. My niece helped make these; kid art elevated. Quirky corner filler – who says budget can’t be fun?

    How to Actually Make This Work For You

    Start by eyeing your emptiest wall and grabbing whatever scraps you got – yarn, twigs, old frames – no shopping spree needed, promise. Measure twice but hang loose; use command hooks to avoid damage if you’re renting like me, and layer textures for that pro look without the fuss. Mix in personal touches, like photos or pressed flowers from vacays, so it screams you – I swap mine seasonally, keeps things fresh. Oh, and test light first; some shine better near windows.

    What’s the cheapest material for wall hanging DIY on a budget?

    Yarn, paper, and sticks from nature – all free or under a buck. I hoard dollar store floss; lasts forever. Avoid glue guns if you can; tape works fine too.

    Do I need crafting skills for these?

    Nope, most are knot-and-hang simple. Watch a 2-min video if crochet scares you – I learned basics from TikTok fails. Yours will look cuter imperfect anyway.

    How do I hang without wall damage?

    Command strips or hooks every time – peels off clean. I rent, so this saved my deposit twice. Test weight first with heavy stuff like planters.

    Can I customize these for any room?

    Totally – boho for bedroom, colorful for kitchen. Match your colors; I toned down bugs for office vibes. Scale up for big walls, cluster small ones.

  • 12 Fun Wall Hanging Diy Ideas for Beginners

    12 Fun Wall Hanging Diy Ideas for Beginners

    Hey girl, remember that blank wall in my living room that’s been staring me down forever? I’ve been obsessed with wall hanging DIY ideas lately – they’re such a fun way to add personality without breaking the bank. Last weekend, I finally tackled one and it totally transformed the vibe.

    This article is my roundup of the cutest, easiest wall hanging DIY ideas I found scrolling Pinterest at 2am – you know how that goes. I tried a couple myself, like the tassel one, and messed up the knots at first but it still looked adorable. Sharing these because they’re perfect for renters or anyone who loves a quick craft win.

    Stick around and you’ll get 12 beginner-friendly ideas with embeds, plus my real-talk tips to make them work in your space. You’ll be hanging these up by the weekend, promise.

    12 Wall Hanging DIY Ideas That’ll Spark Your Creativity

    Crocheted Flower Delight

    This crocheted flower hanging next to a simple wooden frame with greenery is giving me all the boho feels. I love how the soft yarn pops against the wall – super easy if you’ve got basic crochet skills or even a no-sew kit. Made one for my bedroom and it hides that awkward outlet perfectly.

    Leafy Natural Wall Art

    Pressed leaves on a plain white wall – talk about effortless nature vibes! Pair it with a wooden table like this and your space feels alive. I gathered leaves on a walk last fall, pressed them between books, and voila – free decor that smells amazing at first.

    Ceiling Paper Flowers

    These paper flowers dangling from the ceiling add such whimsy – imagine them swaying gently. Cut from colored cardstock, they’re a rainy day project you’ll love. Hung some in my kitchen and they make coffee mornings feel like a party.

    Colorful Tassel Door Accent

    Bright tassels with bells on a wooden door? Yes please for that jingly boho touch. Twist yarn around cardboard to make them – I did and added tiny bells from an old craft stash. They chime when the door opens, total mood booster.

    Glowing String Light Drape

    A simple string light hanging by a potted plant screams cozy nook. Plug in fairy lights and let them cascade – no skills needed. I strung mine above my bed after a bad day; now it’s my unwind spot, flaws and all.

    Book Page Tassel Magic

    Old book pages rolled into a hanging with tassels – literary chic at its best. Grab pages from a thrift book you don’t mind cutting up. Tried this with a plant nearby and it makes my reading corner feel like a secret hideaway.

    Blue Paper Flower Circle

    Circular blue and white paper flowers on a pink wall – so dreamy and soft. Punch circles, layer them up, and hang with pins. My first try was a bit wonky (glue everywhere), but it adds the sweetest pop to bare spaces.

    Fabric Stick Flower Hang

    Fabric scraps, wood sticks, and faux flowers – rustic perfection next to dried grass. Knot fabric on branches for texture. I scavenged sticks from the yard; now it’s my go-to for filling that empty hallway spot.

    Whimsical Owl Duo

    Two cute owls hanging on the wall – playful and unexpected. Felt or paper cutouts sewn or glued onto strings. My niece helped make these; they’re crooked but we laugh every time we see them.

    White Ball Tassel Cluster

    A bunch of white balls and tassels for minimalist texture. Styrofoam balls wrapped in yarn – kid-friendly craft. Hung in my entryway and it softens the whole look without overwhelming.

    Ribbon Chandelier Glow

    Chandelier with dangling ribbons and lace – elegant DIY sparkle. Tie ribbons at varying lengths for movement. I added this above my vanity; gets tangled sometimes, but the sway is worth it.

    Wicker Leaf Art Piece

    Wicker frame with green leaves – organic and sculptural. Weave or glue leaves onto a basket base. Perfect for bathrooms; mine’s steamy but holds up great.

    How to Actually Make This Work For You

    Okay, real talk – start by picking a wall that’s begging for love, measure twice so it doesn’t overwhelm the space, and gather cheap supplies like yarn or scrap fabric from your closet first. Layer textures like in the tassel ones for depth, and always test hang with command hooks if you’re renting – I learned that after peeling paint once, oops. Mix sizes too, like a big leaf piece with tiny paper flowers, to keep it balanced and personal; it’ll feel like you instead of Pinterest-perfect.

    What supplies do I need for basic wall hanging DIY ideas?

    Yarn, sticks, paper, glue, and hooks cover most – nothing fancy. Shop dollar stores or your craft bin. Start small to avoid overwhelm.

    Are these wall hanging DIY ideas renter-friendly?

    Totally, use removable hooks or tension rods. No nails needed for 90% of them. I’ve tested on my apartment walls.

    How long do they take to make?

    Most under an hour – tassels maybe 30 mins. Paper flowers quickest. Binge a show while crafting.

    Can I customize these for holidays?

    Yes! Swap colors or add ornaments. Tassels with bells for Christmas are cute. Makes ’em reusable too.

  • 20 Top Wall Hanging Diy For Beginners for Your Home

    20 Top Wall Hanging Diy For Beginners for Your Home

    Hey girl, remember that blank wall in your living room that’s been staring me down every time I visit? I’ve been obsessed with wall hanging DIY for beginners lately – it’s the easiest way to add that boho vibe without spending a fortune. Last weekend, I finally tackled my own boring space, and omg, it transformed everything.

    This post is basically my roundup of the cutest ideas I found scrolling Pinterest at 2am – you know how that goes. I tried a couple myself, like the yarn one, and messed up the first fringe but laughed it off. They’re all super beginner-friendly, no fancy skills needed.

    Stick with me through these 20 top picks, and you’ll have fresh inspo to make your home feel like a Pinterest dream. You’ll get step-free vibes plus my real-talk tips to nail it.

    20 Wall Hanging DIYs for Beginners That’ll Transform Your Walls

    Ceramic Clock Accent

    This quirky ceramic clock hanging pops against that pink wall – imagine it ticking away in your kitchen. I love how it mixes function with art; super easy to DIY with air-dry clay if you’re feeling crafty. You’d have guests asking where you got it.

    Yarn Art Session

    Sitting on the floor wrapping blue yarns? Total zen moment – I did this exact vibe last rainy afternoon. Grab some string and nails, and you’ve got texture city. Messy but worth it, trust.

    Leafy Nature Hanging

    Pressed leaves on a simple frame next to a wooden table – nature girl heaven. Press ’em between books first, then glue to twine. I added this to my entryway; feels so fresh.

    Wicker Leaf Piece

    Wicker base with green leaves spilling out – boho without the weave skills. Hot glue those faux greens on, hang with jute. You’d love how it softens a plain wall.

    Chairside Wall Tapestry

    That massive hanging behind the chair screams cozy nook. Thrift a drop cloth, fringe the edges – done in an hour. My friend tried it; now her reading spot’s Insta-ready.

    String Art Project

    Yarn wrapped around nails for geometric fun – beginner’s dream. I botched my first heart shape, but second try? Perfection. Hammer, string, voila.

    Multicolor Yarn Cascade

    Those vibrant strands next to a plant – instant room glow-up. Layer cheap yarn on a dowel; I did rainbow for my bedroom wall. So playful, right?

    Crochet Flower Dream

    Yarn crochet with fabric flowers – girl, this one’s romantic. No crochet hook needed if you finger-weave; attach blooms with pins. Hung mine over the bed – dreamy AF.

    Tassel Ball Cluster

    White balls and tassels dangling – minimal magic. Twist yarn into pom-poms, string ’em up. Quick project for your coffee nook.

    Floral Stick Hanging

    Stick with white flowers and leaves – forage and glue. I gathered branches on a walk; added silk blooms. Wall filler in 20 minutes.

    Cardboard Design Base

    Intricate cardboard cutout – recycle city! Trace, cut, paint – that finger point says “easy peasy.” My first was wonky; still cute tho.

    Ceiling Circle Mobiles

    Circular hangings from the ceiling – wall adjacent vibes. Paper hoops, string, suspend. Transforms a boring corner – I tried over my desk.

    Eclectic Wall Gallery

    Furniture-filled room with hanging decor overload – mix it up! Layer thrifted finds; no rules. My living room’s now this chaotic good.

    Fringe Disc Trio

    Colorful fringes with a disc – sway factor 10. Cut fabric strips, knot on rod. I made pink/blue for the hallway; sways so nicely.

    Wooden Mounted Art

    Table-front wall art piece – rustic charm. Burn designs into plywood; easy with a lighter if no tool. Hung behind mine – elevates everything.

    Flower Hanging Planter

    Wall planter with blooms by the window – green thumb hack. Macrame a basket or use hooks. Mine’s fake succulents; zero watering guilt.

    Abstract Black Circles

    Black lines and circles on white – modern edge. Trace with marker on canvas, done. Added to my office wall; feels artsy without trying.

    Colorful Tassel Door

    Bells and tassels on wood – jingly joy. Braid yarn, add bells from the dollar store. I did my closet door; chimes when I grab clothes.

    Stick Face Mask

    Sticks held like a mask – whimsical wall art. Glue twigs in pattern, hang loose. Laughed making mine; perfect kid collab project.

    Cardboard Scissor Cut

    Cardboard on the floor with scissors – start simple. Cut shapes, layer, string. My beginner hack: recycle boxes for endless supply.

    How to Actually Make This Work For You

    Okay, real talk – start with stuff you already have like yarn scraps or sticks from the yard, that way you’re not out cash if it flops, which mine did twice last month. Pick one wall that’s begging for love, measure twice before hammering anything, and layer two or three hangings for that full boho look without overwhelming the space. Oh, and hot glue gun is your BFF – it forgives all beginner sins, just test on scrap first so you don’t melt your couch, ha.

    What supplies do I need for beginner wall hangings?

    Yarn, sticks, cardboard, scissors, hot glue – basics from home or dollar store. No fancy tools; I started with zero craft stash. Keeps it cheap and fun.

    How long does a yarn wall hanging take?

    Under 30 minutes for simple fringe ones. My first took an hour ’cause I overthought colors. Practice speeds it up.

    Can I do these without power tools?

    Totally – hand tools or no tools at all. String art uses just nails and hammer if you have one. Glue everything else.

    What if it looks messy like my first try?

    Embrace the imperfection; boho’s all about organic vibes. Add more layers or fringe to hide oopsies. Yours will get better quick.

  • 25 Best Wall Hanging Diy Aesthetic That Are Stunning

    25 Best Wall Hanging Diy Aesthetic That Are Stunning

    Hey girl, remember that blank wall in my apartment staring back at me every morning? I finally turned it into pure magic with some wall hanging diy aesthetic projects – think cozy textures and pops of color that just scream “you’ve got style.” It’s like giving your space a hug without spending a fortune.

    I got obsessed after scrolling Pinterest one rainy afternoon, and honestly, my first attempt was a hot mess – yarn everywhere! But now? My living room feels like a Pinterest board come to life. These ideas are perfect if you’re craving that effortless boho vibe too.

    Stick with me through these 25 stunning picks, and you’ll snag easy DIY inspo to make your walls pop. You’ll walk away ready to grab your yarn and get crafting – promise.

    25 Wall Hanging DIY Aesthetics You’ll Want to Try ASAP

    Colorful Crocheted Yarn Tassels

    These multicolored crocheted yarns with dangling tassels add such a playful vibe to any wall – I love how they catch the light. I tried making one last weekend, and it took me like two episodes of my fave show. Total game-changer for boring spaces, right? Hang it above your bed for that dreamy touch.

    Macrame Plant Buddy

    Nothing beats a macrame wall hanging paired with a lush potted plant – instant boho corner. You can knot this up in an afternoon if you’ve got basic skills. Mine’s in my kitchen now, and it makes chopping veggies way more fun.

    Sunny Paper Butterflies

    Colorful paper butterflies on strings dancing in front of a white wall? Yes please, especially with that sunlight glow. Super easy DIY – just cut, string, and hang. I did this for my entryway, and guests always ask how.

    Curtain-Draped Plant Glow

    A simple white curtain beside a green plant in a vase creates this soft, airy wall hanging aesthetic. It’s minimal but so elegant – perfect for renters. I swapped my old sheer for this, and my room feels twice as big.

    Circle Paper Mandala

    Cardboard and paper circles forming a big wall circle with hands in the center – quirky and artsy. Grab some craft paper and glue; you’ll be done fast. I hung mine crooked at first, laughed it off, and now it’s my fave imperfection.

    Pink Wall Art Vibes

    Colorful chairs and tables pop against a pink wall in this museum-inspired setup. Recreate with paper cutouts for a DIY twist. It screams fun – I want this in my dining nook.

    Layered Living Room Layers

    Furniture-filled room with tons of hanging wall decor next to a door – eclectic perfection. Mix textures like this, and your space feels lived-in. Tried a mini version; now I’m hooked on layering.

    Ornament Art in Progress

    Someone crafting a decorative ornament piece – shows the DIY process so real. I followed a similar tutorial and burned my fingers on hot glue, oops. But the end result? Worth every singe.

    Crocheted Flower Frame

    A crocheted flower next to a wooden frame with green leaves – sweet and simple wall art. Yarn and a hoop, that’s it. You could whip this up while binge-watching.

    Flower Jar Plate

    Pink plate holding jars with flowers and hearts – adorable mini hanging. Thrift a plate and fill with bits from your yard. Hung mine by the mirror; tiny joy boost.

    Tasseled Boho Wall

    Colorful wall hanging loaded with tassels beside a plant – peak aesthetic. I love the movement when you walk by. Perfect for your reading spot.

    Beaded Tree of Life

    Three macrame hangings with beads and tree motifs – spiritual and stylish. String beads on cord for this look. My friend’s version inspired my whole wall redo.

    Bow Hair Clip Display

    Colorful hair clips with bows – turn them into cute wall decor. Clip to ribbon and hang up. I did this for my vanity; now makeup time is cuter.

    Floral Couch Corner

    Wall hanging bursting with flowers and greenery by a white couch. Fresh and inviting – fake stems work great. You need this chill zone.

    Stick Flower Cascade

    White wall hanging with flowers and leaves on a wooden stick. Lightweight and whimsical. I glued mine wonky – adds character, ha.

    Circular Pattern Burst

    Wall hanging packed with designs and circles – textured dream. Layer fabrics or paper for depth. This one’s calling my name for the bedroom.

    Blue Paper Flower Circle

    Circular hanging with blue and white paper flowers on pink wall. Punch out petals and layer. So pretty against blush tones.

    Stick Face Mask

    Sticks held like a mask in front of a wall – fun sculptural idea. Forage sticks and wire together. I laughed making mine; it’s silly-cool now.

    Ceiling Paper Blooms

    Blue and yellow paper flowers from the ceiling in a hallway. Hang low for wall effect too. Office vibes, but I’d do my hall.

    Hanging Flower Planter

    Wall planter overflowing with flowers by a window. Succulents or faux – either way. Brightens any sill spot.

    Wood Block Collage

    Art from wooden blocks and colored paper on the wall. Stack and paint your way. I used scraps; zero waste win.

    Plant-Side Wall Tapestry

    Simple wall hanging next to a green plant – clean and green. Fabric scraps sewn up quick. You can totally DIY this.

    Chair Flower Backdrop

    Chair in front of a flower-draped wall – photo-ready setup. Drape garlands loosely. Perfect for your lounge area.

    Wicker Leaf Sculpture

    Wicker art with green leaves – natural texture heaven. Weave and tuck foliage. Earthy vibes all day.

    Mason Jar Twine Blooms

    Mason jars with flowers hanging on twine against a wall – rustic charm. Raid your recycling for jars. I filled mine with wildflowers from a walk; smells amazing.

    How to Actually Make This Work For You

    Okay, real talk – start small by picking one wall in your space that’s begging for love, like above your couch or that awkward entry spot, and measure twice before hanging so nothing crashes down mid-Netflix. Grab affordable supplies from the dollar store or your yarn stash – think cotton cord, embroidery hoops, and fake greenery that looks real enough – then layer two or three pieces at different heights for that effortless stacked look without it feeling cluttered. Test with removable hooks first if you’re renting, and play with lighting – a little lamp nearby makes textures pop like crazy. Oh, and don’t stress perfection; a little asymmetry is what makes it yours.

    What’s the easiest wall hanging DIY for beginners?

    Go for paper flowers or tassels – just cut shapes, string ’em up, no fancy skills needed. I started there and built confidence fast. Takes under an hour!

    How do I hang these without damaging walls?

    Use command hooks or washi tape for lightweight stuff; they peel right off. I’ve moved three times with zero marks. Pro tip: wait 24 hours after sticking.

    What materials are best for boho wall hangings?

    Macrame cord, yarn, driftwood, or paper for budget vibes. Mix textures like wool and cotton. Thrift stores are goldmines for this.

    Can I make these on a tight budget?

    Absolutely – most use stuff you have or under $10 total. Scavenge nature for leaves, reuse jars. My fave ones cost pennies.

  • 10 Quick Diy Raised Garden Bed On A Budget to Try

    10 Quick Diy Raised Garden Bed On A Budget to Try

    Hey girl, remember when I turned that sad patch of dirt in my backyard into a thriving veggie oasis with a DIY raised garden bed on a budget? It was a total game-changer – fresh herbs right outside my kitchen door, and I spent like under $50. If you’ve been dreaming of growing your own tomatoes without breaking the bank, you’re in the right spot.

    I put this together because last summer I was broke from moving but obsessed with homegrown salads – so I scoured for cheap hacks that actually worked. My first attempt used old pallets from a neighbor’s discard pile, and boom, salads for weeks. Trust me, you don’t need fancy tools or a huge yard to pull this off.

    Stick with me for 10 quick DIY raised garden bed on a budget ideas that’ll have you harvesting in no time – super simple, with all the inspo you need to start today.

    10 Quick DIY Raised Garden Beds on a Budget You’ll Wish You Tried Sooner

    Pallet Wood Garden Glow-Up

    This pallet wood raised bed is pure genius – just disassemble free pallets, nail ’em into a frame, and fill with soil over sand for drainage. I grabbed some from behind a store last year, and my basil went wild. So rustic and cheap, you’ll feel like a pro gardener overnight.

    Cinder Block Veggie Fortress

    Cinder blocks stacked into a sturdy circle? Under $2 each at home depot sales – instant raised bed that lasts forever. You can plant right in the holes for herbs too. I built one for strawberries, and they tumbled over the edges like magic.

    Gravel Path Planter Paradise

    Love this gravel-centered setup with simple wood or block raised planters around it – keeps mud away and looks polished. Perfect for small yards. My friend did this and now hosts epic garden BBQs; I need to copy it ASAP.

    Wall-Mounted Strawberry Towers

    Guttermount strawberries on your fence or shed wall – zero ground space needed, and gutters are like $5 at hardware stores. Vertical gardening on a dime! I tried a mini version on my garage, picked berries all summer long.

    Basic Box Starter Bed

    Just untreated lumber screwed into open boxes on grass – fill one, leave others for later. Easiest entry point ever. Pro tip: line with cardboard to kill weeds underneath. Mine started with lettuce and snowballed into full feasts.

    Wooden Veggie Planter Powerhouse

    This tall wooden frame bursting with veggies screams abundance – build with 2×6 boards for under $30. I added legs from scrap to avoid rot. Harvesting carrots feels like winning the lottery every time.

    Grate-Top Build Hack

    Metal grate over wood frame for airflow and critter-proofing – smart twist on basics. Grab scraps from construction sites. You could totally DIY this in an afternoon with basic tools; my backyard version keeps rabbits out perfectly.

    Grass-Edge Veggie Patch

    Simple wood borders hugging grass for an outdoor veggie haven – no gravel needed. Budget win. I edged mine with free fence pickets, and now it’s my go-to for zucchini overloads every summer.

    Tiny Timber Plant Haven

    Adorable small-scale wooden bed for herbs or starts – scales up easy. Perfect if you’re testing the waters. This one’s my fave for balconies too; grew perfect cherry tomatoes on my tiny patio last year.

    Double Wood Planter Duo

    Two side-by-side wooden planters on grass – companion planting heaven. Mix flowers and veggies for pest control. I plopped these down and forgot about weeding; nature did the rest, kinda messy but so rewarding.

    How to Actually Make This Work For You

    Okay, real talk – start by scouting free or cheap materials like pallets and cinder blocks from local buy-nothing groups or habitat restores, then sketch your space on paper to fit your yard perfectly. Layer cardboard at the bottom for weed barrier, mix in compost from kitchen scraps to save on soil, and water deeply but infrequently so roots go deep – I learned that the hard way after my first soggy fail. Oh, and pick sunniest spot possible; my shadiest bed gave me leggy plants until I moved it. Scale small first, like one 4×4 bed, build confidence before going big – you’ll avoid overwhelm and have wins fast. Rotate crops yearly to keep soil happy without fancy fertilizers.

    What’s the cheapest material for DIY raised beds?

    Cinder blocks or free pallets top the list – blocks run $1-2 each and stack no tools needed, pallets are often free curbside. I scored mine for zero bucks. Line with landscape fabric if you want longevity.

    Do raised beds need a bottom?

    Nope, open bottoms let roots breathe and improve drainage, but add wire mesh if gophers are an issue. My open ones thrive on grass. Just bury cardboard first for weeds.

    How much soil for a 4×4 bed?

    About 8-10 cubic feet for 12-inch deep – buy bulk from nurseries to save, or mix your own with compost. I stretched one bag across two beds with fillers. Test drainage with water first.

    Best plants for budget beds?

    Go tomatoes, lettuce, herbs, strawberries – high yield low cost. Succession plant for steady harvest. My beds pay for themselves in one season’s salads.

  • 25 Fun Diy Raised Garden Bed Ideas for Beginners

    25 Fun Diy Raised Garden Bed Ideas for Beginners

    Hey girl, remember when I tried growing tomatoes in those sad little pots on my apartment balcony? Total fail – they keeled over from bad soil. That’s why I’m obsessed with DIY raised garden bed ideas now; they’re a game-changer for anyone like us who wants fresh veggies without the hassle.

    I finally built my first one last spring in my tiny backyard, and let me tell you, it was messy but so worth it. No more bending over forever or dealing with rocky ground – these beds make gardening feel easy and fun. I’ve gathered the best inspo from Pinterest to share with you.

    Stick around, and you’ll get 25 fun DIY raised garden bed ideas perfect for beginners. You’ll find simple builds, clever materials, and tips to make your own green thumb dream come true. Let’s dive in!

    25 DIY Raised Garden Bed Ideas That’ll Spark Your Green Thumb

    Planter Bench Overflow

    This wooden bench doubles as a planter – genius for small spaces! I love how it’s packed with pots of herbs and flowers; you could totally DIY it with scrap wood. Last summer, I made a mini version for my patio, and it became my go-to spot for morning coffee with fresh basil right there. So practical, right?

    Wall-Mounted Veggie Planters

    These vertical wall planters are perfect if you’re short on ground space – look at those thriving veggies! Stack ’em with lettuce or strawberries for easy picking. You can use gutters or old shelves; I tried something similar on my fence and harvested cherry tomatoes all season. Game-changer for apartments.

    Classic Wooden Beds

    Simple raised beds like these scream beginner-friendly – just sturdy wood frames filled with soil. Plant carrots or kale in neat rows for that pro look. I built three last year; one’s still going strong with zucchini. Easy peasy.

    Prepping Bare Ground

    Cleaning the ground first with a shop vac? Smart move before building – keeps weeds away. Cover it with landscape fabric too. I skipped this once and regretted it; weeds took over. Lesson learned!

    Cinder Block Fortress

    Cinder blocks stacked into a raised bed – cheap and no carpentry skills needed! Fill the holes with soil for extra herbs. My neighbor did this in one afternoon; now it’s bursting with peppers. You’ll love how sturdy it is.

    Cozy Wooden Box

    This little wooden box is adorable for herbs or salad greens. Screw together some 2x6s, add legs if you want. I have one by my back door – perfect for snipping cilantro fresh. So cute and functional.

    Filling with Rich Soil

    Pouring in that dark, fluffy soil is the best part – your plants will thank you. Mix compost for drainage. Did this for my beds and watched everything explode with growth. Magic dirt, basically.

    Block Border Basics

    Concrete blocks make an instant raised edge – stack and fill. Great for veggies that need deep roots. I used leftovers from a patio project; zero waste win.

    Veggie-Packed Wooden Rows

    Look at this veggie paradise in raised wooden beds – tomatoes, beans, everything! Companion plant for max yield. My first attempt was chaotic, but now I rotate crops like a boss. Inspiring, huh?

    Empty Beds Ready

    Freshly built wooden raised beds waiting for soil and seeds. Line ’em up for a tidy garden look. You could add paths with mulch between. Can’t wait to see yours filled!

    Stacked Flower Towers

    Planters stacked high against the house – vertical gardening at its best. Use for flowers or trailing vines. I stacked pots like this once; bees loved it, and so did I.

    Grassy Veggie Patch

    A simple outdoor veggie garden in the grass – raised edges keep it contained. Perfect starter setup. My backyard started just like this; now it’s my pride and joy.

    Pallet Wood Wonder

    Pallet wood turned into a sandy garden bed – free materials! Kneel in to plant without backache. I scored pallets from a neighbor; built it in a weekend. Total budget win.

    Fire Pit Pivot

    Unfinished cinder setup could easily become raised beds around a fire pit. Multi-purpose yard vibes. Imagine grilling veggies you grew yourself – yes please!

    Mini Wooden Planter

    Tiny wooden structure overflowing with plants – ideal for balconies. Nail it together quick. Mine sits on my steps with succulents; low-maintenance green.

    Trellis Brick Garden

    Brick pavers and trellis fence a raised garden perfectly. Train climbers up the trellis. I added one for peas; they climbed like crazy. So satisfying.

    Gravel Center Planters

    Raised planters around a gravel center – drainage on point! Surround with grass for charm. This setup saved my soggy herbs last rainy season.

    Kneel-Friendly Beds

    These beds are the right height for easy weeding. Wood frames hug the house nicely. Perfect for us shorties – no more sore knees!

    Strawberry Wall Climb

    Strawberries growing up the side of a building – vertical berry heaven! Use pockets or shelves. I tried strawberries in hanging planters; sweetest snack ever.

    Large Gravel Planter

    Big wooden planter on gravel base – stable and weed-free. Great for root veggies. Mine holds potatoes now; digging them up is treasure hunt time.

    Barnside Veggie Boxes

    Three wooden boxes brimming with veggies by a barn – rustic goals! Red barn backdrop is chef’s kiss. You can recreate this anywhere with character.

    Manicured Veggie Stand

    Tall wooden planter loaded with produce – stand and admire! Mix flowers in for pollinators. I planted marigolds with mine; bugs stayed away.

    House-Side Wooden Rows

    Wooden planters lining the house with trees behind – shady spot win. Herbs thrive here. My side yard looks just like this now; neighbors ask for tips.

    Dirt-Topped Yard Work

    Working soil into a new planter – the satisfying buildup. Pat it down firm. First bed I filled felt like a big deal; still my favorite.

    Front Yard Garden Beds

    White house curb appeal with flanking garden beds – dreamy! Plants soften the edges perfectly. I added these to mine; instant homey vibe. (Oops, forgot to weed last week – real life!)

    How to Actually Make This Work For You

    Okay, real talk – start by picking a sunny spot in your yard, at least 6 hours of light, and measure twice before cutting any wood because I messed that up once and had to buy extra boards. Use untreated lumber or cedar for longevity, mix in compost-heavy soil for nutrients, and water deeply but infrequently to encourage strong roots; oh, and mulch on top to keep moisture in and weeds out. Space beds 2-3 feet apart for easy access, and if you’re renting, go for cinder blocks or pallets so it’s not permanent – trust me, that flexibility saved my last move.

    What’s the cheapest material for DIY raised garden beds?

    Cinder blocks or free pallets are your best bet – under $50 for a big bed. I’ve used both and they hold up great. Just line with fabric to keep soil in.

    Do raised beds need a bottom?

    Nope, open bottoms let roots grow deep, but add cardboard first to smother grass. I did this and no weeds all season. Super simple.

    How deep should a raised garden bed be?

    12-18 inches works for most veggies; deeper for carrots or potatoes. My 16-inch ones are perfect – no back strain. Adjust for what you plant.

    Can beginners really build these?

    Absolutely, start small with pre-cut wood from the store. I had zero skills and mine thrive. You’ll be harvesting in weeks!

  • 12 Top Diy Raised Garden Bed For Beginners for Your Home

    12 Top Diy Raised Garden Bed For Beginners for Your Home

    Hey girl, remember when I tried growing tomatoes in pots last summer and they all flopped? Total disaster. That’s why I’m obsessed with DIY raised garden beds for beginners – they’re a game-changer for us newbies who just want fresh herbs without the hassle.

    I put this roundup together because I finally built my first one last weekend, and oh my gosh, it’s so rewarding. No more bending over awkwardly in the dirt – these keep everything at waist height. My back thanks me already.

    Stick with me through these 12 top picks, and you’ll have all the inspo plus simple tips to make your own. You’ll be harvesting your own salads in no time, promise.

    12 DIY Raised Garden Beds for Beginners You’ll Wish You Tried Sooner

    Simple Tarp-Lined Wood Bed

    This one’s super basic – just wood frames lined with black tarp over grass. I love how it keeps weeds out without fancy materials. Perfect if you’re starting small in your backyard.

    Cinder Block Starter Garden

    Cinder blocks stacked into a quick bed – fill ’em with soil and go. No tools needed beyond stacking, which is why I did this for my mom’s patio last year. She still raves about her herbs, and it cost like $50 total. You’ll feel like a pro instantly.

    Gravel Base Wooden Box

    A wooden box on gravel next to existing beds – drainage on point. I added one like this by my fence, and it solved my soggy soil issues forever.

    Lush Multi-Plant Border Bed

    Check out these sides bursting with plants – middle one’s thriving too. It’s inspiring for mixing veggies and flowers. Imagine this in your yard, girl.

    Curb Appeal Front Yard Beds

    White house vibes with raised beds flanking the path – instant charm. I copied a mini version for my entryway, and neighbors keep asking for the how-to. So easy to scale down.

    Grate-Topped Build in Progress

    Wood and metal grate combo under construction – sturdy for heavy soil. Reminds me of my failed attempt without reinforcement; lesson learned. You can do this over a weekend.

    Backyard Wooden Box Classic

    Tall wooden box surrounded by scrap boards – ready for dirt. I built something similar with pallet wood I had lying around. Saved cash and looks rustic cute.

    Pro tip: line the bottom with cardboard first.

    Stepped Garden Bed Design

    Wooden steps turning into garden space – genius for slopes. If your yard’s uneven like mine, this levels everything out beautifully.

    Fence-Side Planter Tending

    Raised box against the fence, perfect for easy reaching. Those two gardeners make it look fun – that’s me and my sister now, every Sunday. Veggies taste better when you grow ’em together.

    Multiple Bed Veggie Patch

    Several beds packed with greens – scalable dream setup. Start with one, add more as you get hooked, like I did.

    Rustic Barnside Planters

    Three wooden ones overflowing with veggies by a barn – farm girl goals. I don’t have a barn, but my garage version works the same. Truck in the back? Total vibe.

    Fresh picks right outside the door – yes please.

    Wall-Mounted Strawberry Side

    Strawberries climbing a building side in raised pockets. Space-saving magic if you’re tight on yard. Mine are going nuts this season – sweetest berries ever.

    How to Actually Make This Work For You

    Okay, real talk – start by picking a sunny spot in your yard, at least 6 hours of light, and measure twice before cutting any wood because I messed that up once and had to redo boards. Use untreated cedar or pine for beds since it lasts longer without chemicals leaching into your food, and always add a bottom liner like landscape fabric or cardboard to block weeds without killing the soil vibe. Oh, and fill with a mix of topsoil, compost, and a bit of sand for drainage – I grabbed mine from the garden store for cheap, and it made my plants explode. Scale it to your space; even a 4×4 foot bed feeds a family if you plant smart like tomatoes, lettuce, and herbs close together. Test the soil pH too – aim for 6-7 – with a $10 kit, trust me it saves headaches later.

    What’s the cheapest material for a beginner raised bed?

    Cinder blocks or untreated pine boards – under $100 for a 4×4. I used blocks first and they’re still going strong after two years. Super forgiving if you stack wonky.

    Do I need tools to build one?

    Nope, not fancy ones – hammer, screws, and a saw if you’re woodworking. Borrow from a neighbor like I did. Keeps it beginner-friendly.

    How do I fill it without breaking the bank?

    Mix store-bought topsoil with homemade compost or free leaves. My secret? Hugelkultur – bury branches at the bottom for free drainage and nutrients. Works like magic.

    Can I do this in a small yard or apartment?

    Absolutely – go vertical with wall-mounted or corner boxes. I squeezed three into my tiny patio, and now I’ve got salads weekly. No yard required.

  • 15 Best Diy Raised Garden Bed Aesthetic That Are Stunning

    15 Best Diy Raised Garden Bed Aesthetic That Are Stunning

    Hey girl, have you ever dreamed of that perfect diy raised garden bed aesthetic in your backyard? The kind where vibrant greens pop against natural wood, making your space feel like a cozy farm-to-table haven? I totally get it – I fell in love with mine last spring when I built one from scratch using old pallets.

    This post is all about sharing the 15 best diy raised garden bed aesthetics that stole my heart from Pinterest. I’ve tried a few myself, like that time I turned scrap wood into a veggie paradise, and let me tell you, it’s game-changing for fresh salads right from your yard. No more boring dirt patches – just stunning, functional beauty.

    Stick around, and you’ll get easy inspiration plus tips to make your own without the headaches. You’ll be obsessed and harvesting in no time.

    15 DIY Raised Garden Bed Aesthetics You’ll Want to Copy ASAP

    Veggie-Packed Wood Bed

    Look at those carrots, lettuce, and broccoli thriving in this simple wooden setup – it’s pure diy raised garden bed aesthetic goals. I built something similar last year, and pulling my own veggies felt like magic. The natural wood tones blend so perfectly with the greenery, right?

    Lush Multi-Plant Paradise

    This overflowing bed screams abundance with all those veggies and herbs mixed in. You can totally recreate it on a small patio – I did with pots first to test. Side note: those colors make me crave a garden salad every time I scroll past.

    Curb Appeal Garden Beds

    Flanking a white house like this? Instant charm upgrade with plants spilling over. My front yard got that vibe after I added beds last summer – neighbors actually stopped to compliment. It’s low-key elegant, don’t you think?

    Layered Plant Explosion

    Plants climbing everywhere in this clever design – total diy raised garden bed aesthetic win. I tried vertical layering once, but weeds snuck in; lesson learned with better mulch. You’ll love how it maximizes space.

    Flower-Filled Dream Bed

    Blooms galore next to that happy gardener – makes you want to grab a trowel. I planted flowers in mine for pollinators, and butterflies showed up weekly. So pretty, even on rainy days.

    Multiple Bed Cluster

    Several raised beds together like a mini farm – practical and stunning. Picture harvesting dinner from your own setup. I spaced mine out for easy access, no backaches here.

    Upside-Down Planter Hack

    Whoa, plants growing top and bottom from this wooden wonder – genius diy twist. I made a tiny version for herbs on my deck; tomatoes dangled perfectly. Fun fact: saves ground space big time.

    Grass-Topped Wood Planter

    Simple wooden box brimming with plants on fresh grass – effortless aesthetic. You could DIY this in an afternoon with basic tools. Mine’s become my morning coffee spot now.

    Log and Flower Border

    Logs outlining colorful flowers – rustic diy raised garden bed aesthetic at its best. I gathered free logs from a neighbor’s yard; zero cost magic. Blends wild and tidy so well.

    Dirt-Ready Yard Build

    That hands-on vibe with dirt flying – reminds me of my messy first build. Guy’s got the right idea prepping soil. Get your hands dirty; it’s worth every speck.

    Tiny Wooden Plant Nook

    Adorable small structure packed with greens – perfect for apartments. I scaled one down for my balcony herbs last month. Compact but punches above its weight in charm.

    Kneeling Garden Tender

    Her kneeling by that lush bed? Total zen moment in the diy world. I do this daily now – therapeutic after work. Builds that personal connection with your plants.

    Fence-Fixing Garden Edge

    Blue gloves, pipe, and bucket mid-fence fix near beds – real-life diy. Reminds me of patching my own wonky frame with scraps. Imperfect but authentic aesthetic.

    Brick Wall Garden Scene

    Dogs peeking over while she gardens by bricks – cute chaos. I garden with my pup “helping” too; adds joy. Urban diy raised garden bed aesthetic nailed.

    Vegetable-Loaded Wood Planter

    Man proudly by his veggie-packed planter – harvest heaven. Built mine like this and shared extras with friends. You’ll feel like a pro farmer instantly.

    How to Actually Make This Work For You

    Okay, real talk – start by picking untreated cedar or redwood for your diy raised garden bed; it lasts forever without chemicals leaching into your soil, trust me, I learned after my first pine one rotted in a season. Size them 4×8 feet max so you don’t strain reaching the middle, and elevate to 18-24 inches if your back complains like mine does after long days. Layer cardboard at the bottom to smother weeds, then fill with a mix of topsoil, compost, and peat – I tweak mine yearly for better drainage, and it keeps everything thriving without fancy store-bought mixes. Oh, and site them in full sun with good airflow; my shady spot failed miserably first try, so scout yours now.

    What’s the cheapest material for DIY raised beds?

    Repurposed pallets or untreated lumber from scraps – I scored free pallets online and they held up great. Just disassemble carefully to avoid splinters. Seals the rustic aesthetic without breaking the bank.

    Do raised beds need a bottom?

    Not always, but cardboard or landscape fabric works wonders against weeds. I skip solid bottoms for earthworm access – healthier soil that way. Adjust based on your yard’s critters.

    How do I prevent soil from washing out?

    Line with hardware cloth if pests are an issue, and mulch heavily on top. My heavy rains used to erode mine until mulch saved the day. Keeps it tidy and moist.

    Best plants for beginner raised beds?

    Go tomatoes, lettuce, herbs – quick wins that forgive newbie mistakes. I started there and expanded; flavors beat store-bought every time. Mix flowers for that stunning aesthetic pop.

  • 15 Quick Diy Painting On A Budget to Try

    15 Quick Diy Painting On A Budget to Try

    Hey girl, remember that time I turned my boring apartment walls into a colorful vibe zone with just $10 in paints? DIY painting on a budget is my absolute go-to for feeling artsy without breaking the bank. It’s like therapy, but way cheaper and you end up with cute decor.

    I started this because last summer, I was scrolling Pinterest late at night, dreaming of gallery walls but hating the price tags at stores. So I grabbed dollar-store supplies and messed around – one project turned into a whole weekend obsession. Now my place looks like a boho dream, and I want you to try it too.

    In this post, you’ll get 15 quick DIY painting on a budget ideas that are super beginner-friendly. I’ll share my real stories and tips so you can jump right in. Promise you’ll be hooked by the third one!

    15 Quick DIY Painting on a Budget Ideas You’ll Wish You Tried Sooner

    Dot Art Phone Magic

    Using your phone screen as a guide for dotted designs? Genius for precise patterns without fancy tools. I did this with leftover nail polishes on coasters – spilled a bit, but it added character, haha.

    Dalmatian Rock Pup

    Paint a spotted Dalmatian face on a smooth rock for instant cuteness. Grab rocks from your yard to keep it free. My first try looked wonky, but now it’s my desk buddy – you gotta love those imperfections.

    Pour Paint Pour-Fect

    Just pour paint straight onto paper and tilt for abstract swirls. No brushes needed, total budget win. I made wall art for my kitchen this way – guests always ask where I bought it.

    Green Tree Brushstrokes

    Simple tree outlines with green paint on basic paper. Layer shades for depth without spending extra. Tried it on a rainy afternoon; now it’s framed in my hallway.

    Flower Glue Layers

    Acrylic flowers topped with glue for shine – seals and adds texture cheaply. Perfect for cards or coasters. I gifted these to my sister; she still has them up.

    Blue Pink Dot Table

    Dots in blue and pink on paper, ready for framing or mats. Use q-tips for tiny budgets. My version brightened my coffee table – super quick fix.

    Easy Flower Brush Blooms

    Loose brushstrokes for wildflowers on any surface. Mix paints you already have. I painted these on old notebooks – turned junk into journals.

    WIP Easel Vibes

    Capture that in-progress easel moment for motivation. Use cardboard as canvas to save cash. Mine’s still half-done… but it inspires me daily, you know?

    Scissor Paper Cuts

    Cut shapes then paint around them for clean edges. Frees up your hands from masking tape. Did a whole series for my entryway – took like 20 minutes total.

    Brush Stroke Simplicity

    One brush, endless strokes on paper. Build patterns as you go. Perfect for when you’re low on ideas – I filled a sketchbook this way last month.

    Intricate White Design

    White paint on black for bold contrast – thrifted box base. Fine tip brush is key. My attempt smudged once, but flipping it made an abstract cool piece.

    Scissor Flower Wood

    Scissors to stencil flowers on scrap wood with acrylics. Rustic and free if you have leftovers. Hung mine in the bathroom – adds that cozy touch.

    Red Flower Vase Accent

    Paint red flowers next to a thrift vase for wall art. Green brush pops against white. I recreated this for my bedroom – feels like spring year-round.

    Crayon Cutout Flowers

    Color with crayons, cut flowers – kid-simple but chic. Use broken ones to stay budget. My niece and I made a bunch; half are crooked, all adorable.

    Oh, and we laughed so hard when the scissors slipped – best craft day ever.

    Canvas Flower Burst

    Bright flowers exploding on cheap canvas. Blend colors wet-on-wet for softness. This one’s my fave – did it after a bad day, instant mood lift.

    How to Actually Make This Work For You

    Okay, real talk – start by raiding your junk drawer for old paints, brushes, even nail polish works in a pinch, and hit the dollar store for paper or rocks if needed. Layer thin coats so you don’t waste product, and always test on scrap first to avoid oops moments like my pink blob disaster. Mix in household stuff like glue or scissors for texture without extra buys, and set a 30-minute timer per project to keep it fun and not overwhelming – trust me, that’s how I finished 10 pieces last weekend without burnout.

    What supplies do I need for DIY painting on a budget?

    Basics like acrylic paints from the dollar spot, cheap brushes, paper or rocks, and water cups. Reuse jars for palettes. You’ll spend under $15 total if thrifting smart.

    Can beginners really pull these off?

    Totally – most use simple strokes or pours, no skills required. My first rock dog looked like a potato, but practice makes it yours. Just dive in messy.

    How do I make them last longer?

    Seal with dollar-store mod podge or clear glue. Hang away from sun. I’ve had mine up two years now, still vibrant.

    Where should I display these budget paintings?

    Gallery walls, shelves, or lean on ledges for casual vibe. Mix with thrifted frames. My kitchen nook exploded with color this way – game-changer.

  • 12 Fun Diy Painting Ideas for Beginners

    12 Fun Diy Painting Ideas for Beginners

    Hey girl, remember that time I spilled acrylic paint all over my kitchen table trying to channel my inner artist? DIY painting ideas have been my go-to therapy lately – they’re cheap, fun, and you don’t need to be Picasso to make something cute. I’ve been obsessed with grabbing whatever’s around the house and turning blank canvases into little mood boosters.

    This post is basically me spilling all my fave beginner-friendly finds because I wish someone had shoved these in my face when I started. Last weekend, I finally hung up a wonky flower canvas I made from one of these – my roommate actually complimented it, total win. It’s all about that satisfying mess that ends up looking intentional.

    Stick around and you’ll snag 12 super approachable DIY painting ideas that’ll have you itching to grab a brush tonight. I’ll share exactly what hooked me on each one, plus some real-talk tips to make ’em work for your space.

    12 DIY Painting Ideas That’ll Spark Your Creative Side

    Brush Grip Basics

    Starting simple with how to hold that brush just right – this one’s a game-changer for newbies like me who used to cramp up after five minutes. I tried it on some scrap wood and suddenly my strokes felt way more confident. You’ll love how it turns shaky lines into something smooth.

    Wall Art Chair Accent

    Picture this painting chilling above a cozy chair – instant room glow-up without buying anything fancy. I recreated a mini version for my bedroom wall last month, and it makes reading sessions feel so much more vibey. Hang yours low for that casual gallery feel.

    Paper Stroke Practice

    Just you, paper, and paint letting loose with big swooshes – perfect for warming up without pressure. My first try ended up looking like abstract modern art, which I’m calling intentional now. Grab cheap watercolor paper; you’ll be surprised how addictive it gets.

    Water Drop Magic

    Dripping water on wet paint for those dreamy bleed effects? Obsessed – I did this on a board for my coffee table and guests kept asking where I bought it. Pro tip: use a spray bottle for control, or just wing it like I did and embrace the happy accidents. (Side note: my floor got a lil’ messy, worth it.)

    Green White Swirls

    Swirling green and white on paper for that fresh, earthy vibe – so therapeutic on a rainy afternoon. I made one to match my plants, and now my shelf looks curated AF.

    Scissor Flower Stamps

    Who knew scissors could stamp perfect flowers on wood? I grabbed kitchen shears and acrylics, ended up with a tray that hides my junk mail beautifully. This DIY saved my boring side table – try it with bold colors for pop. Oh, and I totally smudged one petal, but it adds character, right?

    Phone Dot Art

    Using your phone screen as a guide for dotted patterns – genius for precise designs without rulers. Last girls’ night, we all tried it with cotton swabs and giggles ensued. Yours could be a custom phone case or journal cover; super personal touch.

    Red Paint Edge Play

    Playing with red paint edges on paper for bold, minimal statements. I stuck mine in a frame from the dollar store – boom, gallery wall starter. Feels fancy but took like 10 minutes.

    Toothbrush Splatter Fun

    Old toothbrush + paint = galaxy-level splatters on black paper. I did this tipsy one night and woke up to my fave piece yet; orange and blue vibes are unreal. You’ll wanna do a whole series for seasonal switches – holiday ones next?

    Pink Flower Box

    Hand-painted flowers popping on a black box – pink perfection for trinkets. Mine holds my rings now, and I catch myself smiling at it daily. Easy to customize with your birth flower.

    Green Tree Landscapes

    Whipping up quick trees with green paint on paper – forest escape in minutes. I hung a trio in my hallway, and it tricks everyone into thinking I hiked recently. Layer shades for depth; mine started flat but bloomed with practice.

    Back when I first moved into my apartment, I was too broke for real art, so these trees became my cheap fix. Now they’re conversation starters at parties.

    Canvas Flower Blooms

    Classic flowers on canvas that scream springtime joy. I botched the stems on mine but added leaves to cover – turned out better. Frame it skinny for modern edge; you’ll use it everywhere.

    How to Actually Make This Work For You

    Okay, real talk – dive in by setting up a no-stress station with newspaper down and tunes on, because half the fun is the mess without the cleanup drama. Start tiny like with paper scraps before committing to canvas, and mix tools like toothbrushes or scissors to keep it fresh – I always layer thin paint coats so you can fix oopsies easy. Play with your room’s colors too; match ’em or contrast for that wow, and don’t overthink perfection, girl – your quirks make it yours. Oh, and thrift frames always elevate the vibe without breaking the bank.

    What supplies do I need for these DIY painting ideas?

    Grab acrylic paints, brushes, cheap canvases or paper, and household hacks like old toothbrushes – under $20 total at most stores. I started with a dollar store kit and it’s still going strong. No need for pro gear right away.

    I’m not artistic – will these work for total beginners?

    Totally, these are made for us non-art majors with simple steps and forgiving techniques. My first ones looked wonky but hung anyway. Practice once and you’ll feel like a pro.

    How do I hang my paintings without damaging walls?

    Use command strips or washi tape for renters – I’ve tested both and zero marks left. For heavier ones, lean on shelves for that casual look. Super easy swaps too.

    Can I do these with kids or as group fun?

    Yes, perfect for family nights – just use washable paints. My niece and I dotted flowers last week; chaos but the best kind. Scale down for little hands.